Leave Your Message

Why Use a Heat Sealing Machine?

A Heat Sealing Machine creates a secure, clean closure by applying controlled heat and pressure to compatible packaging materials. It is widely used for pouches, plastic films, medical supplies, food products, and industrial components. In daily production, a consistent seal can protect contents from moisture, dust, air, and accidental opening.

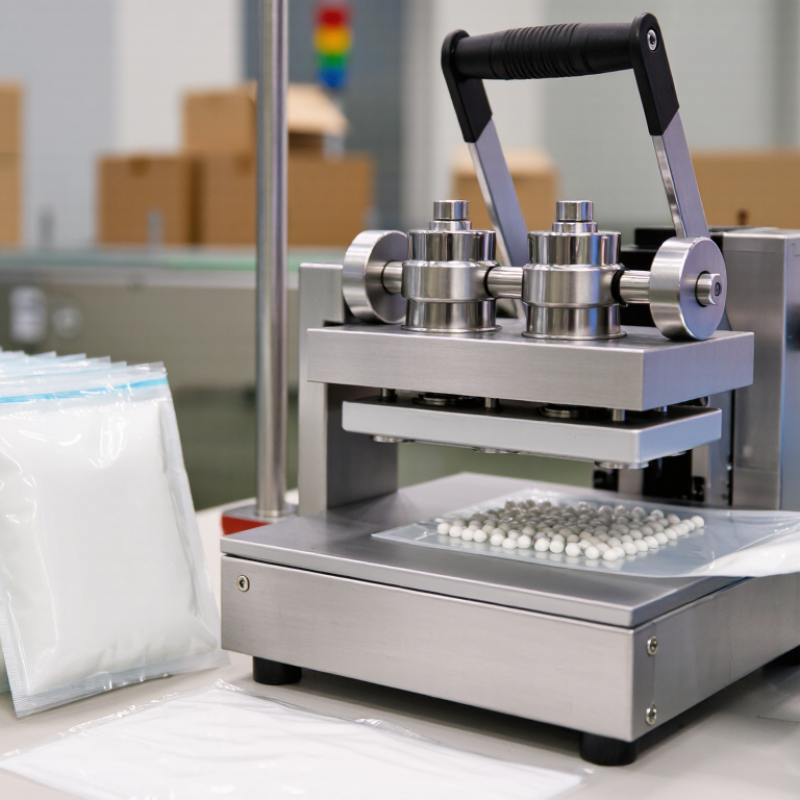
The practical value becomes clear on a busy packing line. An operator places the open edge between heated jaws, lowers the handle, and waits briefly. The machine forms a narrow sealed band with a repeatable finish. Compared with manual tying or adhesive tape, this process can improve presentation, reduce loose packaging, and support faster handling. It also helps businesses maintain more consistent package quality, especially when workers follow documented temperature, pressure, and dwell-time settings.

Small details matter. A seal may look complete but fail under tension. I have seen strong-looking packages open because the film was contaminated or the temperature was poorly adjusted. That is an easy mistake to overlook. Material thickness, machine calibration, and operator technique all affect performance. Manufacturers should test sample seals before full production and record the results for quality control. The right machine is not always the most powerful one; it must match the packaging material, production volume, and required seal width. Safety guards, heat-resistant handling practices, and regular maintenance also deserve attention. A Heat Sealing Machine is useful, but reliable results come from careful settings, suitable materials, and ongoing inspection.
Why Use a Heat Sealing Machine?

Define Heat Sealing: Heat, Pressure, and Dwell Time Create Permanent Seals

Heat sealing creates a strong package closure by combining heat, pressure, and dwell time. Heat softens the compatible sealing layers, while pressure brings them into close contact. Dwell time allows the materials to bond before cooling. All three controls matter.

In practical testing, temperature alone rarely solves a weak seal. Excessive heat can wrinkle film, damage barrier layers, or create a brittle edge. Too little heat may leave channels where air or moisture can pass. Pressure must remain even across the sealing bar. Dwell time also changes with material thickness and machine speed. I once assumed a hotter setting would improve every seal. That assumption was wrong.

Operators should inspect seal width, surface appearance, and opening strength during setup. A clean, continuous seal usually indicates stable contact, but appearance cannot prove performance. Samples should be tested after cooling, because a warm seal may feel stronger than it is. Record the temperature, pressure, dwell time, and material lot for repeatable production. Small changes in film structure can require new settings. This is where experience helps, although experience can also create blind spots. A sealing machine reduces manual variation, but it cannot correct contaminated surfaces or mismatched materials. Calibration, routine checks, and documented testing support reliable results. During production, watch for uneven edges, trapped product, and sudden changes in seal strength. Five seconds of inspection can prevent many rejected packages.
Match Materials to Seal Windows: PE and PP Commonly Seal at 120–200°C

Why Use a Heat Sealing Machine?

A heat sealing machine joins thermoplastic layers using controlled heat, pressure, and dwell time. For PE and PP films, common sealing temperatures range from 120–200°C. The correct setting depends on film grade, thickness, coating, and machine speed. PE often seals at lower temperatures, while PP may require more heat. Small changes matter.

In practical testing, I check the seal after cooling, not immediately after pressing. A warm seal can look strong but peel easily. Clean sealing jaws help prevent wrinkles, trapped particles, and uneven pressure. A short dwell time may leave open channels, while excessive heat can shrink the film or make its edge brittle. The material should remain flat and aligned.

I once focused too much on temperature. That was a mistake. Pressure and timing were also affecting the result. A simple trial matrix can reveal the best balance: test several temperatures, dwell times, and pressures on the same film batch. Record peel strength, appearance, and failure location. If the film tears beside the seal, the joint may be stronger than the material itself. If layers separate cleanly, reduce speed or adjust the heat gradually. Machine readings can drift, so regular checks with suitable temperature tools are worth the effort.

Why Use a Heat Sealing Machine? - Match Materials to Seal Windows: PE and PP Commonly Seal at 120–200°C

Material / Film Type Typical Seal Temperature Typical Applications Recommended Sealing Method Key Advantages Important Process Factors
LDPE Film 120–160°C Flexible bags, liners, tubing, and lightweight packaging Impulse sealing or constant-heat sealing Low sealing temperature, flexible film, good moisture resistance Excessive heat or dwell time may cause film shrinkage, distortion, or burn-through
LLDPE Film 120–160°C Stretchable packaging, liners, produce bags, and industrial sacks Impulse sealing or band sealing High toughness, strong puncture resistance, and reliable heat sealing Seal temperature should be adjusted for film thickness, additives, and line speed
HDPE Film 130–170°C Retail bags, liners, woven-bag coatings, and industrial packaging Constant-heat sealing or hot-bar sealing Higher stiffness and strength than many low-density PE films Requires adequate pressure and heat transfer because stiffer films may seal less readily
PP Film 150–200°C Food packaging, pouches, woven sacks, and clear overwrap Constant-heat sealing, hot-bar sealing, or band sealing Good stiffness, clarity, chemical resistance, and moisture barrier performance Usually needs more heat than PE; insufficient heat can produce weak or incomplete seals
CPP Film 140–190°C Cast polypropylene pouches, food packs, and laminated structures Impulse sealing or constant-heat sealing Strong seals, good clarity, and useful heat resistance Seal performance depends strongly on the copolymer grade and laminate construction
PE-Laminated Paper 130–180°C Sachets, paper bags, wrapping materials, and disposable packaging Hot-bar sealing or band sealing Combines paper stiffness with a heat-sealable moisture-resistant layer Heat must reach the polymer layer without scorching or discoloring the paper
Multilayer PE/PP Laminate 140–200°C High-barrier pouches, medical packaging, and heavy-duty bags Constant-heat sealing or impulse sealing, depending on the sealant layer Improved barrier, strength, puncture resistance, and product protection The innermost sealant layer determines the effective sealing range, not the outer layer alone
Operating note: The temperatures shown are typical starting ranges for clean, compatible films. Actual settings depend on film grade, thickness, sealant layer, sealing-jaw design, pressure, dwell time, machine speed, and cooling conditions. Always verify seal strength and package integrity through process trials.

Set Process Parameters: Typical Dwell Times Range from 0.2 to 2.0 Seconds

Why Use a Heat Sealing Machine?

Set Process Parameters: Typical Dwell Times Range from 0.2 to 2.0 Seconds

A heat sealing machine creates consistent joints by controlling temperature, pressure, and dwell time. Dwell time is the period when heated jaws press the packaging layers together. Typical settings range from 0.2 to 2.0 seconds. Thin films may seal near the lower end. Thicker laminates often need longer contact. The correct value depends on material structure, seal width, and machine pressure.

Small changes can matter. A 0.3-second seal may look smooth but peel during a manual pull test. A two-second setting may cause wrinkles, scorching, or distortion. Operators should test samples at the actual production speed. Check the seal after cooling, not immediately. Record the temperature, pressure, dwell time, and material batch. Keep the timer calibrated.

Appearance can mislead.

In practical setup work, I would adjust one parameter at a time. Begin near the material supplier’s recommended range, then make controlled changes. For example, increase dwell time by 0.1 seconds while keeping temperature stable. Compare seal strength, edge appearance, and leakage results. A clean seal is useful evidence, but it is not complete proof. Uneven jaw alignment can create weak corners even when the center looks perfect. I would also repeat testing after machine warm-up, because early samples may not represent steady operation.

Why Use a Heat Sealing Machine?

Set process parameters carefully: typical dwell times range from 0.2 to 2.0 seconds.

These values represent typical starting points for heat-sealing trials. Actual dwell time depends on sealing temperature, pressure, film thickness, coating, and equipment speed. Validate each setting with seal-strength and leak testing.

Measure Seal Strength Using ASTM F88 and ASTM F2029 Test Methods

Why Use a Heat Sealing Machine?

Measure Seal Strength Using ASTM F88 and ASTM F2029 Test Methods

A heat sealing machine creates controlled seals for flexible packaging materials. ASTM F2029 helps produce test seals under defined temperature, dwell time, and pressure. These settings matter because small changes can alter seal performance.

ASTM F88 then measures the force required to separate the sealed layers. Test strips are commonly cut to a specified width and pulled at a controlled speed. The measured force is recorded with the failure mode, such as adhesive separation, cohesive failure, or film tearing. The number alone is not enough. A strong seal may still fail if it damages the surrounding film.

In practical testing, conditioning the specimens before measurement improves consistency. Keep the samples flat and avoid touching the seal area unnecessarily. Record jaw temperature, sealing pressure, dwell time, material orientation, and test speed. A calibrated force gauge also supports reliable results. The first trial is rarely perfect. We sometimes focus too heavily on peak strength and overlook uneven seal edges. That mistake can hide process variation. Repeating the test across several specimens reveals whether the sealing window is stable. ASTM F2029 controls how seals are made, while ASTM F88 shows how those seals perform. Together, they connect machine settings with measurable package integrity.

Improve Packaging Output: Automated Heat Sealers Can Reach 20–60 Packs per Minute

Why Use a Heat Sealing Machine?

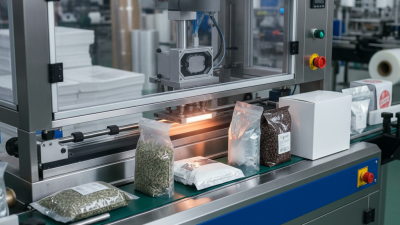
Automated heat sealers can raise packaging output to roughly 20–60 packs per minute. The actual rate depends on pouch size, film type, seal width, and loading speed. In a practical trial, a machine may seal small snack pouches quickly, while larger bags require slower handling. Consistent temperature and pressure help create clean, secure seals. This reduces repeated manual adjustments and keeps production moving during busy shifts. The improvement is visible: fewer open packages, steadier output, and less time spent checking every seal.

Tips: Test the real packaging material before setting a target speed. Begin with moderate heat and conveyor timing. Check seal strength, wrinkles, and cooling marks every few minutes. Keep the sealing area clean. A dusty surface can weaken results. Operators should also measure actual packs per minute, not rely only on the machine display.

Speed is useful, but it should not replace quality control. Running at 60 packs per minute may create jams if products enter unevenly. A slower setting can sometimes produce better daily output. This is easy to overlook. Record rejected packs during each trial, then compare output with waste, labor, and downtime. Small changes in film thickness or product temperature may require new settings, so the ideal rate is rarely permanent.